
15 Essential Beauty Treatments To Try Now That You've Got The Time
Teach yourself some new beauty skills to use now and later
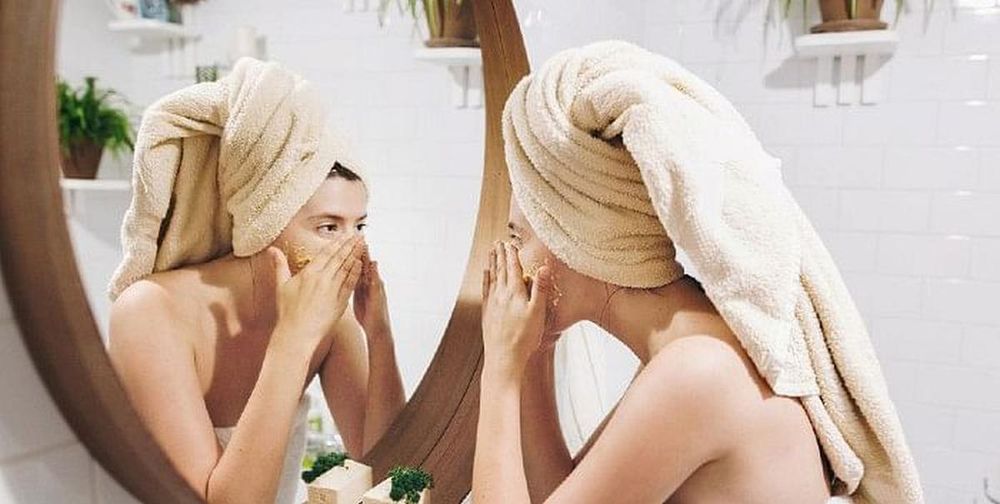

Photo: Getty
Beauty Treatments
If you are looking for a bright side to the new normal, this might be it: Being forced out of your usual beauty routine gives you the opportunity to change it up for the better. Now is the best time to experiment with different beauty techniques—like a scalp detox or intricate nail art—while you're staying safe at home. You never know, maybe you'll pick up a habit you'll love even after quarantine ends. Ahead, 15 essential beauty skills to learn right now from celebrity makeup artists, hairstylists, and manicurists.
1 Perfect a Zoom-Ready Updo
"If you spend an extra five minutes on your ponytail you can make it more special than a gym hairstyle. I sent Dakota Johnson to the Oscars in this ponytail, and to this day I still get questions about it. It’s a ponytail–but it’s all about the details. You need to use at least two elastics. By the time you’ve wrapped the elastic around a ponytail two or three times you’ve already stretched it out and it will slide. The first elastic is used to create the ponytail and the second elastic is to hold it in place. After that it’s all about the hair in front of the ears and at the nape of the neck. If you have a ton of flyaways there it’s not ‘romantic, 'it’s messy. You can use a little spoolie brush coated in hairspray to sweep all of those little hairs into the ponytail." –Mark Townsend, hair stylist.
2 Try a Pre-Shampoo Hair Treatment
"This is a really good time to try pre-shampoo treatments. My clients usually tell me they never have time for it. But if you’ve ever colored your hair before you have some damage. So slap conditioner in your hair and put a shower cap on. No one’s seeing you! You can do a treatment on damp hair or dry hair. Try any type of heavy coconut oil conditioner on the mid-length to ends. If you’re not going to be able to get a professional haircut in a while, you’ll need to take great care of your ends. Look for natural nut oils— almond, coconut, macadamia—because they’re full of fatty acids that actually make up the hair, and they have a smaller molecule so they can get into the hair instead of sitting on top." –Mark Townsend.
3 Indulge in High-Tech Skincare Tools
"I’m a big advocate of at-home tools. I love love LED lights. I have every LED light under the sun. I have Celluma, Dr. Dennis Gross, The MMSphere by Dr. Marmur. They are not only relaxing and regenerating to the skin, it’s very healing and has so many beneficial properties. I also have at-home microcurrents like the NuFace and the pure lift from FaceGym, which I love. The thing you have to keep in mind is that you’re not going to use LED lights or microcurrents for a week and look like you’re 15 again. These are things you have to do with consistency and it takes time to notice a difference. It’s a hard space to navigate and there are a lot of gimmicky tools and it is also an investment because these tools are not cheap. But those are two treatment that I use that make a difference in my skin. So now that we have plenty of time and we’re wearing less makeup, it’s the perfect time. Put aside ten minutes (I’m a little bit extra, so I would do 30 minutes) and once you see improvement and how good it feels to take care of your skin you can go from there." – Nam Vo, makeup artist.
4 Detox Your Scalp
"You can try a detoxing scalp treatment to repair stressed hair and an itchy, dry scalp. It regulates sebaceous glands that may be under or over producing scalp oils, removes flakes and dead skin cells and refreshes, rejuvenate and stimulate your scalp to boost healthy cells. It also can improve the look and feel of hair by replenishing moisture and promoting circulation.
First, apply a detox drop/treatment all over the scalp, concentrating mostly where the buildup is, use the fingertips, apply medium pressure to your scalp by moving in small circles, massage for at least five minutes. After the massage, use a detoxifying or clarifying shampoo to remove all excess buildup. Then, apply a scalp nourishing treatment massage for at least five minutes. It can be done in as little as ten minutes, but ideally give yourself 20 minutes." –Nunzio Saviano, hair stylist.
5 Discover Nail Stickers
"Because we are all social distancing, I am really loving the ease of ManiMe. I find it helpful to know how to do a lot of my own beauty treatments because sometimes we are strapped for cash, and sometimes you're stuck in your own home for months at a time. ManiMe creates at-home custom-fit gel manicure adhesives using 3-D scanning and laser-cutting technology so that people can get salon-quality manicures with intricate designs at-home that fit their nails perfectly. I don't personally have the patience to paint nail art on myself, so I much prefer the speed and ease of pre-printed designs. They're really durable and can last up to 14 days while still being very easy to remove.
When applying, it's very important to have clean dry nails, with no oil residue. Wash your hands, then use the alcohol towelette provided to clean the nails. Make sure there's no lotion or oil left on your hands or fingers when handling the stickers. Apply at the center base then press down on the entire nail. You can clip off the excess then file the edge to get a perfectly smooth finish. I find these work best in a warm environment so if you're in an icy cold room or your hands are very cold or your outside in the cold you might find they're not as malleable. I can usually apply them in under 10 minutes." –Madeline Poole, manicurist.
Related article: How To DIY The Best Coconut Oil Hair Mask
6 Attempt a Heatless Hairstyle
"Socks are actually amazing tools to creates curls but I think most people don't know about it. I am loving the look because it feels so cool and deconstructed, created with a pair of thick cotton socks. I’m calling it 'The heatLESS sock waves.' It causes less damage to your hair than heat styling and you get a more natural vibe. It will work on straight hair to create texture and on curly hair to get a more relaxed wave instead of a curl.
It's simple to do: separate hair into sections and weave a sock into each one, then gently remove the socks and you’ll have amazing waves! The braiding part takes five minutes and then the drying time can take anywhere from 45 minutes to overnight depending on the amount of hair you have." –Adir Abergel, hair stylist
7 *Actually* Learn How to Contour
"I know a lot of people have trouble with contouring because they ask me about it all the time. My favorite way to contour is a technique called underpainting. Underpainting is where you add contour and highlight to the face under your foundation. You can do it in a natural way or full glam, and it can be beautifully transformative, if done correctly.
You begin with a cream contour that does not have too much slip, my current favorite is the Kryolan TV paint sticks. I recommend using a brush with a flat edge to contour your cheeks, jawline and forehead. You can even push the contour into the hairline so everything is seamless. After you apply your contour, take a lighter shade of concealer to highlight the high points of the face (under eye, nose, labial folds, between the eyebrows and chin). You then take your liquid foundation—I generally like to thin it out with a little beauty oil—and a stippling foundation brush. In a circular stippling motion starting under the jawline, blend the areas where you contoured towards the center of the face. Underpainting takes a lot of practice to perfect, however give yourself 20-30 minutes to start and play and have fun. Don’t forget makeup washes off, so have fun with it and don't worry about mistakes!" –Scott Barnes, makeup artist
8 Play With Color
"One of my favorite eyeshadow techniques is color washing – it's where you take a color from the lid all the way up through the brow in a wash of color. It's super easy; you can do it with almost any fluffy blending brush and the result will be beautiful. Take a fluffy eyeshadow brush or even a small highlighting brush and in a windshield wiper and circular motion take the eyeshadow color from the lid up through the brow/ brow bone. It only takes 5 minutes, try it on a bare lid or on top of any look and have fun with it!" –Scott Barnes, makeup artist.
9 Learn to Paint Your Non-Dominant Hand
"I have found that learning to paint your non-dominant hand is all about muscle memory. It takes time to train your hand. You don’t need 10,000 hours but a good few months of painting practice and you will get the hang of it. Be patient with yourself. I’m a professional manicurist, but every single time I do my own nails I get nail polish on my skin. So here's how to correct that: You can use a paint brush or an old eyeliner or eyeshadow brush dipped in remover and just use that to clean up the edges. It’s better than a q-tip because not only does it not leave cotton fuzzies, but it’s easier to get in between the skin and the nail. That’s a tip I learned in beauty school. You can also clean up a manicure in the shower. Nail polish’s natural born enemy is water. If you just sort of rub your skin, it will roll off the skin but stay on the nails." –Miss Pop, manicurist.
10 Get Into Simple Nail Art
"Nail art is a very inexpensive opportunity to be creative. It’s a colorful distraction and every day you can do something new with it! What I call drybrush nails is such an easy technique; you don't even need a tutorial. I also call it 'the wet paint manicure' because it looks a but streaky. First, paint your nails a base color. Then, take a second color and when you take the brush out of the bottle, you wipe off all of the polish until almost all of the polish is off the brush and then you take the brush and streak it across the nail. Repeat with as many colors as you like. Mostly I like to do it randomly, but you can make it more placed and do it up the middle of the nail. The best part about it is that every color combination looks good. So whatever colors you have at home is going to make for a beautiful look." –Miss Pop.
Related article: The Best Nail Polishes For Spring/Summer
11 Give Yourself A Full Spa Experience
"Giving yourself weekly facial at home is a great way to get results above and beyond what your normal skincare routine offers. An at-home facial will take about 25 minutes.
Step 1: Start with a thorough yet gentle cleanse to remove all traces of makeup, sunscreen, oil, and debris from skin. This will create the ideal foundation for the rest of the facial, and ensure the following steps are as effective as possible.
Step 2: Apply a thin layer of an exfoliating peel which dissolves cellular build up to provide a really nice exfoliation.
Step 3: Follow immediately with a facial mask. For oily skin, use a non-drying, clay-based mask or a hydrating, gel based formula. If your skin is dry, choose a moisturizing oil-based mask. Leave the mask on for fifteen minutes and then rinse off gently with a washcloth or baby washcloth (for sensitive skin types) or a facial sponge.
Step 4: Finish off with an alcohol-free toner to remove impurities from tap water then seal everything off with a moisturizer. Dab on an eye cream to finish it all off." –Renee Rouleau, facialist.
12 Try Out Gua Sha
"I highly recommend folks at home try out a simple gua sha routine. A gua sha stone is easy to find online and is reasonably priced. You use the flat stone pulled slowly across the contours of the face after applying a serum or oil for ‘slip’. It's great at releasing tension within the facial muscles while also sculpting and lifting, releasing puffiness and excess fluid. It’s incredibly relaxing. It’s a routine that can be as quick or as long as you want it to be, so with more time to do these things it’s great to deepen your gua sha routine if you have one in place already.
First, make sure your skin is cleansed and you have a serum or oil applied so you don’t drag and pull the skin with the stone. Start by slowly running the gua sha tool around the back and front of the neck to open up the lymph pathways before starting on the face. No matter what routine you try, the concept is always to move the stone outwards and upwards up the neck and face. You want to move everything towards the lymph nodes behind the ears and at the base of the neck. A gua sha routine could be performed once or twice a week, or every day. There are no rules! I personally like to do it just before bed as I find it very relaxing." – Sofie Pavitt, facialist.
13 Start Ice Rolling
"Try using an ice roller! Ice rollers are not as well known here in the US as gua sha or other facial tools, but it's a very effective treatment to rejuvenate, depuff, and firm skin. Ice rollers are very affordable and it only takes a few minutes. Unlike derma rollers or gua sha, there’s no redness after. In fact, it helps combat any redness. It’s great a late night or anything else that makes you wake up puffy or irritated.
Keep your ice roller in the freezer so it’s chilled and ready to go in the morning, which is the best time to use your ice roller. You can wash your face first or just splash with cold water. You can also apply a light water or gel-based serum beforehand, but it's not essential. Use the roller back and forth, up and down, and out and up to the side working around facial contours including the neck for at least five minutes. Start with at least five minutes to get the benefits. If you have 10 or 15 minutes, you can do a more extended ritual." – Shamara Bondaroff, facialist.
14 Supercharge Your Sheet Mask
"Now that we have more time, you can really spend some time making a facial the best ritual of the week. My new Magic Glow Wand would be great for doing an advanced at-home facial. The cold setting mimics cryotherapy which automatically makes the face look more awake, gets rid of puffiness and redness and contours the skin. It makes the most out of a mask and feels great on the skin. Start along the side of the neck to mimic a lymphatic drainage massage and then go from middle to the sides of the face in order to deliver the best results. Once you try it, you will realize it only takes an additional five minutes and will super boost your glow!" – Joanna Vargas, facialist.
15 Create A Beauty Alter
"I think makeup is a craft that’s supposed to take time and be meditative. It’s in the time that you spend, that the transformation—not just the physical, visible transformation—but the psychological transformation happens. For me, it’s about taking back your power around that. So I would really want to highlight getting back into the concept of slow beauty and why rituals matter. You can bookend your day with the rituals around makeup, putting it on and taking it off. You can feel empowered by spending time with and connecting with yourself.
I’ve always tried to bring a little more of a consciousness to the beauty ritual in itself. So I've been interested in how to edit your products and how to create a space that looks beautiful. When you feel burdened by your makeup it can feel overwhelming. So doing a really clean, tight edit of your makeup and making sure you really love everything and every single item is useful. I think getting really clear about what you use and how they make you feel is important. Put a picture of your favorite beauty icon up near your mirror or put inspiring images of whoever embodies beauty to you, rather than constantly scrolling through beauty images. It’s not just learning how to do the cat eye that’s going to make you feel better, but creating the space is actually going to make you feel better." – Rachel Goodwin, makeup artist.
This article originally appeared on Harper's BAZAAR US.
Related article: How To Give Yourself A Spa-Like Facial At Home